

Post by gene on May 27, 2008 5:22:48 GMT 8
Hello Mga Sirs!
Last 2 months ago I was having problem on my limited capacity of my Steyr Aug hi-cap mag(330rounds max/mag). In a long and fast skirmish games such mags couldn't meet the demands of such a quick-paced assault or defense. After serious thinking and planning I decided to make an extension of my hi-cap. I would like to share to you all on what I did to my Steyr Aug's hi-cap mag. Hence, I would like to show how to make a mega hi-cap magazine complete with pictures(to help understand what I am talking about). Such pattern/set-up of doing such project can be done to your M4 or any AEG rifle's mag.
In this project, since it is your first time to do it and you worry that you will waste your precious mags hence I would suggest that you buy those China-made mags(which is cheaper)so it will be lesser cost if you fail in achieving the desired set-up. I would recommend you buy Jing Gong mags(cheap but better quality than other ACM mags..as far as I know).
Make sure you got all materials ready, namely:
1) Epoxy
2) Rotary Tools(i.e. Dremel or Stihl) or discarded knife
3) Glue gun with glue sticks(4 or more)
4) Black Electrical tape
5) File
6) 4 JG Mags
7) Dummy rounds from G36 stock magazine.
Also please follow and check the pics for its right position and sides where the holes should be made.
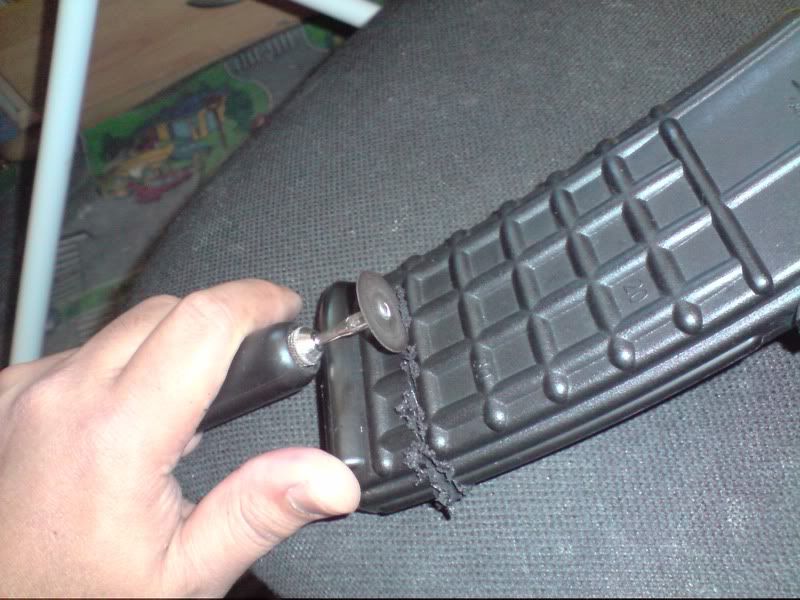
1) Cut the lower half(preferably 1/4 part) of the mag using your rotary tool or heated (discarded)knife.
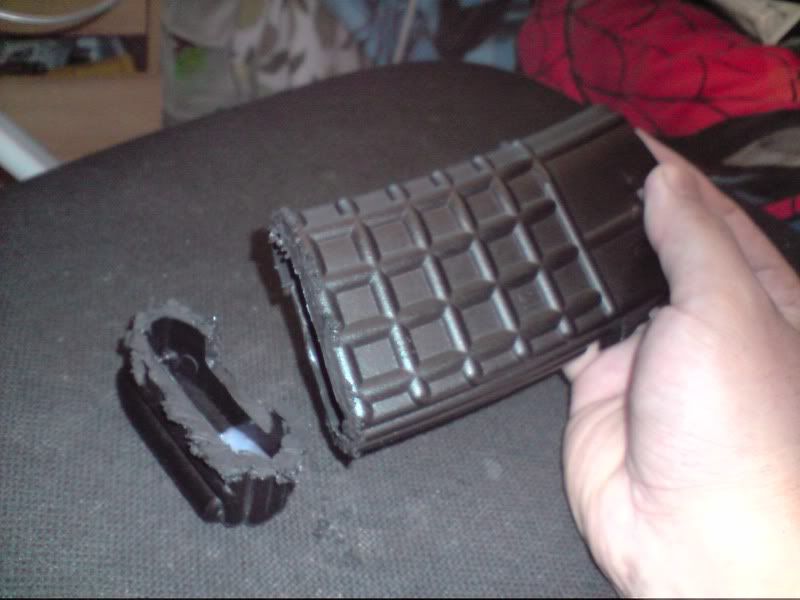
2) File and smoothen the rough surface of the cut area.
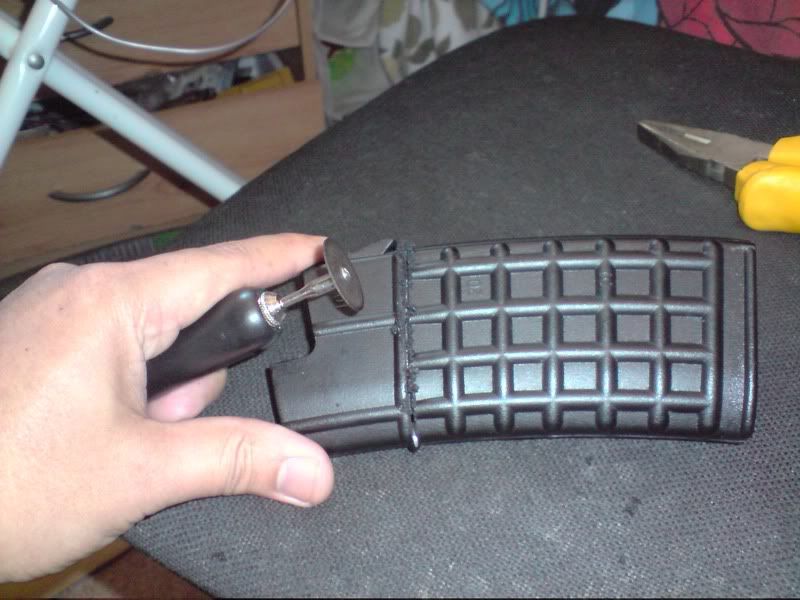
3) Cut the upper(3/4 length) of the other mag using your rotary tool or heated knife.
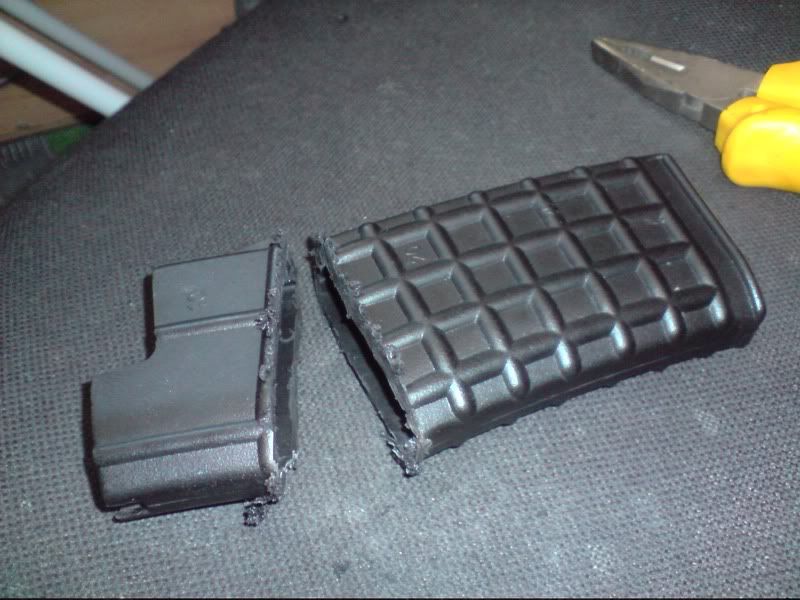
4) Then file and smoothen the rough surface of the cut area.

5) You attach the longer part of the mag to the lower part of other mag using the epoxy(preferably black).
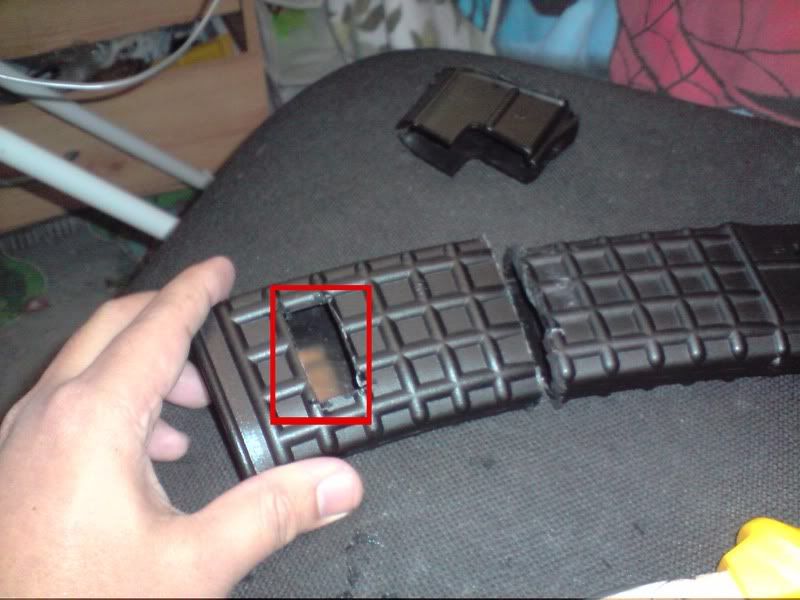
6) Make a rectangular hole at the lower part of the attached/epoxied mag. Please check which side should hole be made.
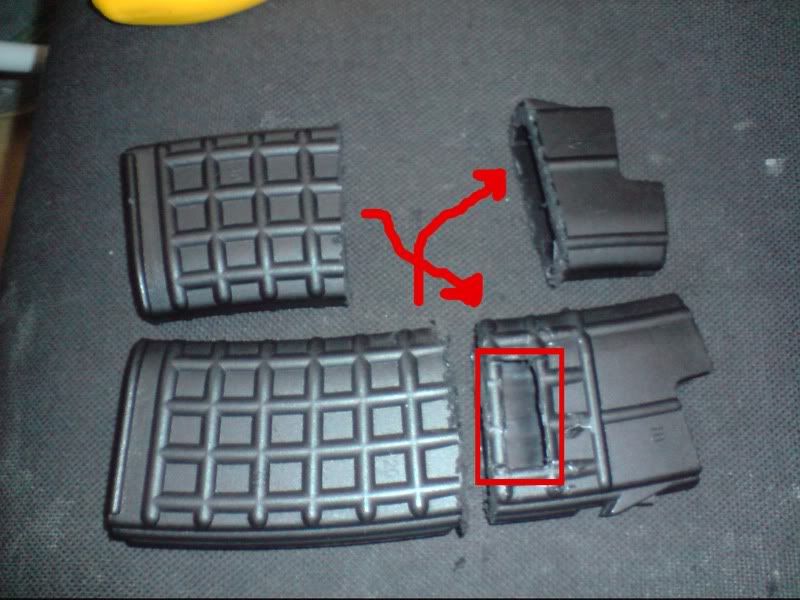
7) Cut 3/4 length of another mag and cut nearly 1/2 length of another mag. Then file and smoothen the rough edges of the cut area. Then attach by using epoxy the upper part of the 1/2 length cut of said mag to the lower part of the 3/4length of the other mag. Then make a rectangular hole upper part of the attached mag.Please check which side should hole be made.
The result of such attachment will be like this:
Please make sure that the modified mags' internal surface are clean from dusts and dirt from the cutting process.
Then . . . .

If the epoxy is already hard enough, try to smoothen the rough edges by sanding or filing it.
Then cut 3/4 length of the inner loading mechanism of the hi-cap mag. Make sure you sand or file the rough edges of the cut end, especially the square tube where the bbs go through. Then place it into the said mag. Make sure that the bottom is securely screwed back.
Then you cut 1/4 length of another inner loading mechanism of the hi-cap mag. Make sure you also sand or file the rough edges of the cut end, especially the square tube where the bbs go through. Then place it into the said mag. *Please don't mind the presence of the mighty bond in the pictures. Please use Epoxy in the attachment of the modified mags.

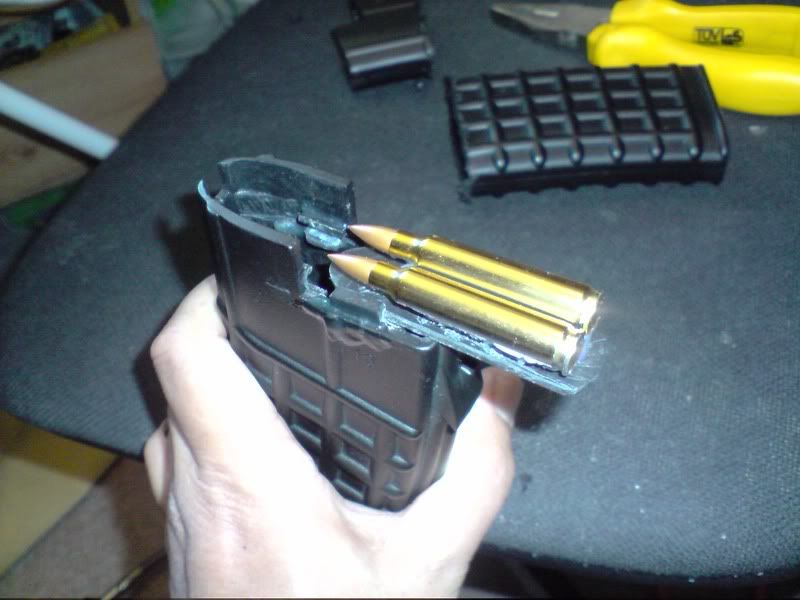
From this modified mag(without inner loading mechanism of the hi-cap mag) make a top cover(sliding type). You can get 2 dummy rounds from a TM G36 stock mag. and epoxy it on the top of the said cover. I can't give you a detailed instruction and illustration regarding the topcover. But see below for (limited)pictures of the said top cover.


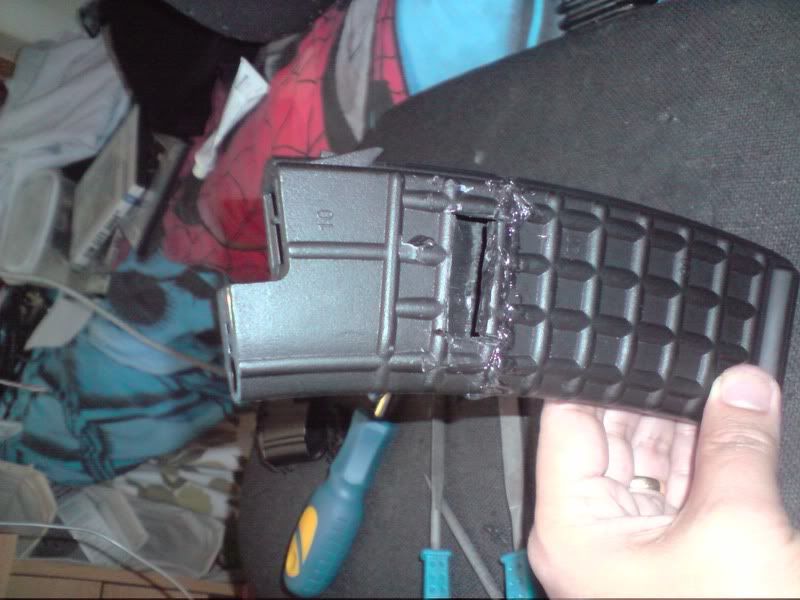
After making this kind of set-up, attach both mag by putting each modified/attached mags with the rectangular holes almost close from each other. But you need to put a 1/4inch gap between the two modified mags to have a good access to the AEG's magwell. You can actualise this by building up liberally a rectangular mound(glue stick) on the mouth of the rectangular hole by using the glue gun. Then attached both mags from the point of contact which is the rectangular holes of each mags. Apply liberally some more glue(stick)around the said mound. Make sure that the rectangular holes are patent and free from blockage from the melting glue stick.
attached to
which results to:


Wrap around electrical tape to the attached mags to stabilise and reinforced its attachment. You can also wrap around electrical tape to the connected area of the extended mag(to cover the uneven surface which I failed to smoothen).
Before putting back the bottom cover of the modified mag make sure that the mag is clean from dirt from the cutting process and glue excess.
You can then use your mega hi-cap for your Steyr Aug...with confidence during games.

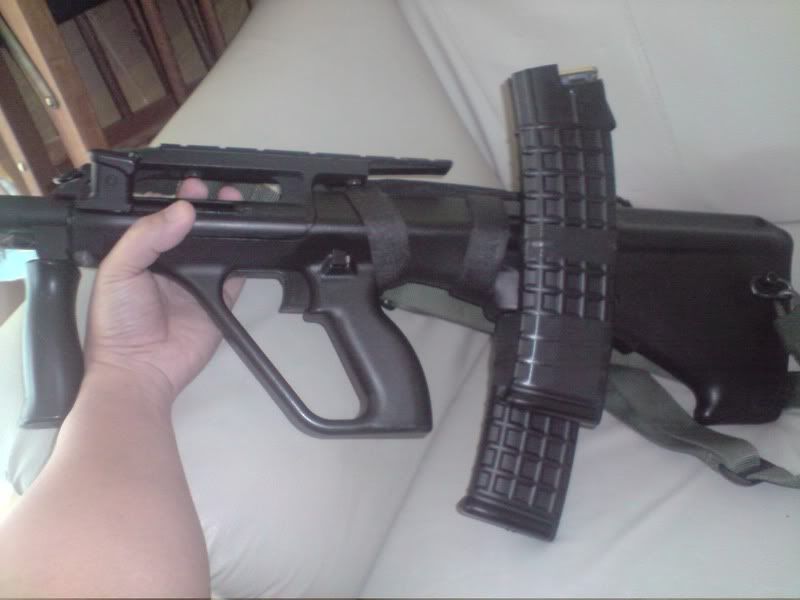
Estimated to hold maximum capacity of 2800rounds.
Last 2 months ago I was having problem on my limited capacity of my Steyr Aug hi-cap mag(330rounds max/mag). In a long and fast skirmish games such mags couldn't meet the demands of such a quick-paced assault or defense. After serious thinking and planning I decided to make an extension of my hi-cap. I would like to share to you all on what I did to my Steyr Aug's hi-cap mag. Hence, I would like to show how to make a mega hi-cap magazine complete with pictures(to help understand what I am talking about). Such pattern/set-up of doing such project can be done to your M4 or any AEG rifle's mag.
In this project, since it is your first time to do it and you worry that you will waste your precious mags hence I would suggest that you buy those China-made mags(which is cheaper)so it will be lesser cost if you fail in achieving the desired set-up. I would recommend you buy Jing Gong mags(cheap but better quality than other ACM mags..as far as I know).
Make sure you got all materials ready, namely:
1) Epoxy
2) Rotary Tools(i.e. Dremel or Stihl) or discarded knife
3) Glue gun with glue sticks(4 or more)
4) Black Electrical tape
5) File
6) 4 JG Mags
7) Dummy rounds from G36 stock magazine.
Also please follow and check the pics for its right position and sides where the holes should be made.
1) Cut the lower half(preferably 1/4 part) of the mag using your rotary tool or heated (discarded)knife.
2) File and smoothen the rough surface of the cut area.
3) Cut the upper(3/4 length) of the other mag using your rotary tool or heated knife.
4) Then file and smoothen the rough surface of the cut area.
5) You attach the longer part of the mag to the lower part of other mag using the epoxy(preferably black).
6) Make a rectangular hole at the lower part of the attached/epoxied mag. Please check which side should hole be made.
7) Cut 3/4 length of another mag and cut nearly 1/2 length of another mag. Then file and smoothen the rough edges of the cut area. Then attach by using epoxy the upper part of the 1/2 length cut of said mag to the lower part of the 3/4length of the other mag. Then make a rectangular hole upper part of the attached mag.Please check which side should hole be made.
The result of such attachment will be like this:
Please make sure that the modified mags' internal surface are clean from dusts and dirt from the cutting process.
Then . . . .
If the epoxy is already hard enough, try to smoothen the rough edges by sanding or filing it.
Then cut 3/4 length of the inner loading mechanism of the hi-cap mag. Make sure you sand or file the rough edges of the cut end, especially the square tube where the bbs go through. Then place it into the said mag. Make sure that the bottom is securely screwed back.
Then you cut 1/4 length of another inner loading mechanism of the hi-cap mag. Make sure you also sand or file the rough edges of the cut end, especially the square tube where the bbs go through. Then place it into the said mag. *Please don't mind the presence of the mighty bond in the pictures. Please use Epoxy in the attachment of the modified mags.
- o -
From this modified mag(without inner loading mechanism of the hi-cap mag) make a top cover(sliding type). You can get 2 dummy rounds from a TM G36 stock mag. and epoxy it on the top of the said cover. I can't give you a detailed instruction and illustration regarding the topcover. But see below for (limited)pictures of the said top cover. After making this kind of set-up, attach both mag by putting each modified/attached mags with the rectangular holes almost close from each other. But you need to put a 1/4inch gap between the two modified mags to have a good access to the AEG's magwell. You can actualise this by building up liberally a rectangular mound(glue stick) on the mouth of the rectangular hole by using the glue gun. Then attached both mags from the point of contact which is the rectangular holes of each mags. Apply liberally some more glue(stick)around the said mound. Make sure that the rectangular holes are patent and free from blockage from the melting glue stick.
attached to
which results to:
Wrap around electrical tape to the attached mags to stabilise and reinforced its attachment. You can also wrap around electrical tape to the connected area of the extended mag(to cover the uneven surface which I failed to smoothen).
Before putting back the bottom cover of the modified mag make sure that the mag is clean from dirt from the cutting process and glue excess.
You can then use your mega hi-cap for your Steyr Aug...with confidence during games.
Estimated to hold maximum capacity of 2800rounds.


